Showing posts with label ref. Show all posts

Thursday, January 2, 2014

Winter thoughts

It was 5 degrees on the local weatherbug thermometer as I bundled up to go check on the chickens this morning.  Any temperature above zero (and below 90F) works fine by me however I suspect that the girls would prefer something in the 60's.
It's no wonder that January is Oatmeal, Soup, as well as Hot Tea Month.  All sound delightful as I give the girls their morning scratch.  The door to the chicken house stays closed on these cold mornings.  Inside is a warm 42F. I'm always a little surprised by how warm chickens can be however just to be sure that they stay snug at night, a heavy layer of clean hay covers the floor and a heat lamp is strategically positioned near the waterer (just not too close to the hay).  They all happily surround my boots as I step in each morning, pecking away the snow or grooming my pant cuffs and pleats.  Moving slowly, I check for eggs while talking softly with the girls.
We're getting quite a few eggs each day.  As you note, they are quite colorful.  It's no surprise that Americaunas are in the group of chickens called 'Easter Eggers'.  Despite the chilly temps outside, everyone is warm and happy inside.

BTW: for those who are interested, here is a link to an application to calculate Wind Chill:
http://www.onlineconversion.com/windchill.htm
based on this, the 5F with a slight 4mph wind, drops the temp to -3.  I think a cup of hot tea would be good right about now.


Tuesday, August 20, 2013

Random Musings, part 1

"What are you doing?"
How many times have people asked me this question?  I usually hear it when I'm doing something that they themselves hadn't thought of.

The Scoop: I needed a scoop to help transfer chicken feed.  The quick answer was to take an empty heavy duty vinegar bottle (one gallon), cut the jug at a diagonial for an instant scoop with a handle.  I did something similar years ago when I needed a funnel to fill a tube shaped birdfeeder.  Using a quart sized bleach bottle, the scoop made it easy to ladle the birdseed from the bag, then by removing the cap, the seed would easily flow into the tube, filling it. 
One just has to be extra careful when cutting it out (use scissors and go slow).

Yummy stuff: This year has been a good year for pickles.  Although we have put up around four gallons of various types of canned pickles (hot water bath, sealed in the jar), we also have some lovely refrigerator pickles.  These are so quick and easy to do.   They can provide a low calorie, cool treat on a hot day.  
As you look at this picture you'll note all space below the floating pickles.  Hard to believe that this jar was absolutely jam packed with cucumbers just a couple of weeks ago.  As the pickles cured, the salt and vinegar drew the moisture from them, causing them to shrink and shrivel.  There's a product on the market called 'Pickle crisp' which will prevent the pickles from looking quite so wrinkly.  These taste wonderful.  They just don't look quite as pretty as they might.

Bedbye: As the rounders have gotten older, they are acting more and more like the grown ups.  They have learned:
When I come by, knock on the door, and announce, 'Housekeeping' that means for them to go out into the yard and not get under foot while I try to clean chickenland.
A steady call from me at the gate, 'back back back' means to move away from the gateway to the yard, cause I have some treats to share.  (And anyone who ducks under the gate and heads for the pasture will find himself without his buddies.  Fortunately, Mom is there to the rescue, to gently scoop up the lost lamb and return him to the fold.  And, yes, I'm talking about you Buster...).
At the end of the day, when it's time for little chickies to be tucked in for bed, there's always two or three (usually Amy,  Dusty, and Jet) that just want to play outside a little longer.
 "Bed-bye!" is the signal for all little chickies to head inside.  Usually, they're pretty good about it with only a minimal amount of whining.  My husband just shakes his head and laughs.

So what did you find today that made you pause, smile, and laugh?


Sunday, July 14, 2013

New words and the questioning mind

 I love listening to questions from people who really want to know the answer.  These are the folks that once the question is asked, will explore and read and question until they have a satisfactory answer.  Then they ask again. 

While walking the other day, I wondered why certain things are considered more beautiful that others.  I also wondered why there seemed to be a lot of spirals found in nature.  Think about it: rose petals attach to the flower's center in a spiral pattern.  Even something as mundane as a head of lettuce has leaves that attach to the core following a spiral.
Brace yourself.  We're going into the deep end of the pool.

First: the word of the day: fibonacci. The short version: Back around 1200 AD, an Italian mathematician named Leonardo Pisano discovered a sequence that begins with 0 and 1 which is thought of as the 'golden arrangement' found in nature.  Each successive number is made from the sum of the last 2 numbers, like in the sequence, e.g. 0, 1, 1, 2, 3, 5, 8 etc.  As the numbers go up, the space between the last number also increases forming a spiral.  oh, and Fibonacci?  That was his nickname.  It's actually Italian for Son of Bonacci (his dad).
For of those of you who love math or would like to know how all this works out, there are articles published online that work it all out.
So, obviously, human beings don't look much like seashells, but the Fibonacci also applies to us.  Look at your hand.  Think of the fingernail as a unit = 1.  The bone making up the tip of your finger (distal phalanx) would be equal to 2.  The part next to it (middle phalanx) would be equal to 3.  The part nearest the palm (proximal phalanx) is equal to 5.  and so on.  It is the proportions and balance that contribute to what we describe as beautiful.  To read more, I like Boston University's Fibonacci Sequence site.  Always nice to have a little fun when learning something new.


Sunday, March 17, 2013

Maple Sugaring weekend

I almost let it get by!  This is the first weekend of Maple Sugar Weekend in New York!  What does that mean?  It means that the air is filled with the lovely aromas of maple sap being boiled down to make maple syrup, maple spreads, and maple crystal candies.  This last winter was perfect for the sugarers in our area.  We had deep snows, slow melt, and a long cold spell for the trees to rest and recover from last summer's drought.
The Sugar Maple (Acer saccharum) is a native tree of North America.  Trees were tapped by Aboriginal tribes well before Columbus arrived by inserting a hollow wooden tube into the side of the tree.  As the sap rises in the Spring, some of it is deverted to come out the tube.  A similar principle is used today using more modern materials.
  
 Once the sap is collected, the water is boiled off and syrup bottled for use.  A sealed bottle of fresh maple syrup will keep for about six months.  Maple sugar will keep quite a bit longer if stored in an airtight container in the freezer.
Including Canada, Northeast America provides the majority of the maple syrup to the world (also see: http://www.canadianmaplesyrup.com/maplehistory.html). 


For more information about next week's events including places where you can see and purchase NY maple products: http://www.mapleweekend.com/locations.php
For more interesting facts about maple sugar: http://maple.dnr.cornell.edu/FAQ.htm

Saturday, March 2, 2013

Hatching chicks, Day 12

The incubator has been humming away, keeping the babies warm as they gradually turn into chicks.  We candled the eggs again today to see what is developing.  According to the experts (eggs-perts?), we should be able to see the heart beat by now.  Unfortunately, due to the color and density of the shells, we've had no such luck.  That being said, we have seen the little chicks wiggling around inside their eggs!

According to the Mississippi State University website, one can expect the chick to grow and develop based on the following schedule:

Before Egg Laying:
Fertilization
Division and growth of living cells
Segregation of cells into groups of special function (tissues)
Between Laying and Incubation
No growth; stage of inactive embryonic life (*my note: an egg can remain undistrubed for up to 10 days before incubation and still be viable.)
 
During Incubation:
First day
16 hours - first sign of resemblance to a chick embryo
18 hours - appearance of alimentary tract
20 hours - appearance of vertebral column
21 hours - beginning of nervous system
22 hours - beginning of head
24 hours - beginning of eye
Second day
25 hours - beginning of heart
35 hours - beginning of ear
42 hours - heart beats
Third day
60 hours - beginning of nose
62 hours - beginning of legs
64 hours - beginning of wings
Fourth day - beginning of tongue
Fifth day - formation of reproductive organs and differentiation of sex
Sixth day - beginning of beak
Eighth day - beginning of feathers
Tenth day - beginning of hardening of beak
Thirteenth day - appearance of scales and claws
Fourteenth day - embryo gets into position suitable for breaking shell
Sixteenth day - scales, claws and beak becoming firm and horny
Seventeenth day - beak turns toward air cell
Nineteenth day - yolk sac begins to enter body cavity
Twentieth day - yolk sac completely drawn into body cavity; embryo occupies practically all the space within the egg except the air cell
Twenty-first day - hatching of chick

So what are we looking at?  By all appearances, five of the eleven eggs have signs of continued development.
Those with veins showing when candled continue to darken more and more each time.  What's more exciting is that some of these now show a pronounced shadow about the size and shape of a large butterbean (about the size of a nickle).  I was surprised this morning when one of these little beans wiggled around as I gently turned it in front of the light.  That 21st day is approaching fast!

What about the others?  About half of the eggs appear to not be developing.  This is not unusual for hens as young as ours.  Most of those that did not grow appear under the candler like the one in the lower right hand corner.  This is perfectly normal.  After the others hatch, we'll start collecting another group and try again.


Sunday, February 24, 2013

Hatching eggs, Day 8

This morning we set up the candler and checked the eggs for life.  A candler, for those of you who are unfamiliar with the term, is a gadget used to focus a light so that one may see the shadow of a developing chick.  It can be as simple as a LED flashlight shining through a hole in a can or, in our case, a birdhouse box with a 100 watt bulb screwed into the bottom.

By holding the egg in front of the lighted hole, the developing chick looks like a freckle surrounded by reddish veins spidering away onto the yoke.  It was relatively easy to read the lighter blue shelled eggs.  The darker shelled ones are more of a challenge.  To confirm we'll try again in another few days.
 I don't have a camera to show you what I saw so I made a sketch for you:
The pocket on top is an air space between the shell and shell membrane that the developing chick needs to breathe.  The shell on the air end is more porous allowing gases to exchange while keeping out bacteria and other nasties.  When the chick hatches, this air pocket may provide the chick with its first breath.

For those who want more science-y info on hatching chicks, check the following link: http://chickscope.beckman.uiuc.edu/resources/egg_to_chick/formation.html


Saturday, February 2, 2013

Let's have some fun

After waking to yet another cold, grey day, wind biting cold, I decided that we need to find something in February to celebrate.  What?  Celebrate? Ok, we have the 'big holidays': Groundhog day, Valentine's day, and Presidents day but thanks to our tax dollars at work and some helpful marketing people, there is so much more!  Pick some favorites and embrace the day!


Fun Stuff

February 1 Serpent Day
February 2 Purification Day
February 3 Cordova Ice Worm Day (Superbowl Sunday)
February 4 Create A Vacuum Day
February 5 Disaster Day
February 6 Lame Duck Day
February 7 Charles Dickens Day
February 8 Kite Flying Day
February 9 Toothache Day
February 10 Umbrella Day
February 11 White Tee-Shirt Day and Don't Cry Over Spilled Milk Day
February 12 National Plum Pudding Day
February 13 Get A Different Name Day and Dream Your Sweet Day
February 14 Ferris Wheel Day and National Heart to Heart Day
February 15 National Gum Drop Day
February 16 Do A Grouch A Favor Day
February 17 Champion Crab Races Day
February 18 National Battery Day
February 19 National Chocolate Mint Day
February 20 Hoodie Hoo Day (for chasing Winter away)
February 21 Card Reading Day
February 22 Be Humble Day
February 23 International Dog Biscuit Appreciation Day
February 24 National Tortilla Chip Day
February 25 Pistol Patent Day (Samuel Colt)
February 26 National Pistachio Day
February 27 International Polar Bear Day
February 28 Public Sleeping Day
February 29 National Surf and Turf Day

Food Related
National Cherry Month
National Grapefruit Month
National Hot Breakfast Month
National Macadamia Nut Month
National Snack Food Month

February 19-25 National Pancake Week
February 1 National Baked Alaska Day
February 3 National Carrot Cake Day
February 4 National Homemade Soup Day
February 4 National Stuffed Mushroom Day
February 7 National Fettuccine Alfredo Day
February 8 National Molasses Bar Day
February 9 National Bagels and Lox Day
February 10 National Cream Cheese Brownie Day
February 11 National Peppermint Patty Day
February 12 National Plum Pudding Day
February 13 National Tortellini Day
February 14 National Cream-Filled Chocolates Day
February 15 National Gumdrop Day
February 16 National Almond Day
February 17 National Indian Pudding Day
February 19 National Chocolate Mint Day
February 20 National Cherry Pie Day
February 21 National Sticky Bun Day
February 22 National Cook a Sweet Potato Day
February 22 National Margarita Day
February 23 National Banana Bread Day
February 24 National Tortilla Chip Day
February 25 National Chocolate-Covered Peanuts Day
February 25 National Clam Chowder Day
February 26 National Pistachio Day
February 27 National Chocolate Cake Day
February 27 National Strawberry Day
February 27 National Kahlua Day
February 28 National Chocolate Souffle Day

Saturday, January 26, 2013

Snowstorms and other thoughts

It's hard to believe that we had 50 degree temps a week ago.  This morning we woke up to -8.  With blizzards blowing off Lake Ontario this last week, we hunker down and take care of business.  Winter is the time to take care machinery, build tools and stancions for the coming season, and make plans for the coming year.

When we look out, the snow swirls about us in great waves of white.  Conditions were so severe that at times the animal barn would appear and disappear behind the snow.  One walks cautiously beside the buildings this time of year.  Well aware that a load of snow could easily break and come sliding down, burying the unware passerby.

As suddenly as it came, the storms passed leaving 14, 16, 20, 24 inches of snow behind in its wake.  We gradually clear paths with snowblowers and plows, pausing occasionally to breathe in the frosty air while wondering at the new world before us.  

 
Deer and other wildlife now venture at twilight, pawing at the snow, hoping to find a bit of green grass hidden there.  Mice and voles burrow underneath, creating grass lined highways leading from nest to cache to water to other hiding places.  Those that come to the surface are soon discovered by Sparrow hawks and Owls.  

The orchard and the garden sleep, as we wait for winter to pass.

Something lovely to listen while watching the snow:  A Season of Silence (Winter Music) by Jesse John Wilson Music http://www.youtube.com/watch?v=5duFGwjE9Fs

Saturday, January 12, 2013

Chickenland 2013

We're enjoying a brief January thaw.  As tempertures slowly rise to the mid 50's, the deep snows from several weeks ago retreat.  The chickens aren't real thrilled about the cold, white stuff.  Besides, who enjoys walking around in one's bare feet in the snow?  The warm ground is a treat as is basking in the sunshine now that the wind has laid.
The chickens get a steady diet of layer chow all through the winter.  Occasionally as a special treat, we warm up a little fresh frozen kahl and set it out for their enjoyment.  Sometimes this is sprinkled with some meal worms for a little protein kick.  The protein helps keep them warm and a warm meal in winter is always pleasant.
Flirting

Our big rooster's name is Sandy.  All the girls love him.  He's calm and is very much the flirt.  When a bowl of treats is brought out, after making sure that it's okay and safe, Sandy calls to the girls with a soft 'kah-kah-kah' noise.  As they approach, he picks up a choice piece from the bowl, then gently offers it to one girl and the other, until all have been given something.  They then go ahead and have their fill.  

Junior approachs the bowl
Once all the girls have had attention, our other rooster, Junior, steps up for his share of the treats.  The boys get along well with only an occasional kerfuffle.  There is about a month difference in their ages but their demeanors are similar.   

Someone asked me about the differences in coloration and markings.  All of our chickens are Americaunas except one, Inky.  Our jet black orphan chick, may be a Barred Rock but that's okay.  She's very friendly and will come over and hop into your lap if you come and sit in the chicken house.  She lays a brownish pink egg as opposed to the blue, blue-green eggs that the others lay.  The differences in color among the other chickens reflects the variety within the breed.

Both Sandy and Junior are Wheaten as is Little Miss.  Goldie is a Buff while Missy is considered a Blue.  Molly and the other girls are all classed as silver.  To read more about Ameraucanas check out http://www.ameraucana.org/index.html .

Otherwise, all has been well in Chickenland and the eggs keep coming.  Shorter days means fewer eggs, but still enough for our personal needs.  What's most important is everyone is warm and happy and looking forward to the fresh sprouts come Spring!


Wednesday, November 7, 2012

Icy, frosty mornings

Temperatures hovered around 25 F this morning, making it an excellent time to look at the small crystals that covered the pastures and orchards. 
A fog had settled across our area last night.  As the night turned colder, the fog formed crystals on the foliage which is also known as hoarfrost.  One could easily imagine the frost fairies creating these magical scenes.
If you look closely, some plants have tiny hairs across their leaf surfaces.  This allows the plant to continue to thrive when other plants go to sleep for the winter.  An herb called 'Lambs Ear' is a good example of this furry quality.

Another interesting feature is Needle Ice.  Ever note an area in the soil that appears to have been lightly churned just after a freeze?  This could have been the result of the water droplets in the soil freezing into elongated crystals.  These build and force their way through the soil particles.  Those that break the surface look like tiny glass rods or needles.

This picture also shows the power of ice.  These tiny rods also lift and push rocks and other things to the surface.  One can have a cleared field in late summer, only to discover that come Spring it appears that one is 'growing rocks'.  These little crystals can break down walls, bust up roadways, and do all sorts of damage.  Fortunately we have none of those issues so we can just enjoy how pretty they can be.  As a side note, when looking at needle ice, also look for Frost Flowers.  Similar to needle ice, the frost flower forms where the needle ice comes together and curls a bit to form a flower.  If I have the good fortune to find one, I'll take a picture to share with you.

want to learn a little more about soil and ice?  check this out: http://nsidc.org/cryosphere/frozenground/how_fg_affects_land.html

Sunday, October 21, 2012

Autumn Leaves

I don't know about you, but I love the changes of the seasons.  Whether it is the sprouting of new life in Spring or the crisp Fall mornings when the brightly colored leaves are tinged with frost, each day offers something new to enjoy.


My grandmother used to tell me that being able to identify trees by their leaf or bark is one of the signs of a well educated person.  I'm still learning the differences.  But this time of year, it's hard to get past the 'oooh! Isn't this pretty?' 
We all assume that when the weather turns cool, the leaves of our Maples and Oaks will gradually start to change color.  By why do they change?  Well, to put it simply, as the days start to get shorter trees and other plants start to slow down and rest.  Rest from what?  All those green leaves were working and producing sugars to help the plant thrive and grow.  When the plant slows down making Chlorophyll, which is what makes them green, sugar production slows and the other colors of the leaf suddenly appear.  (If you want to read more about this, check out Science Made Simple:  http://www.sciencemadesimple.com/leaves.html)

All sorts of critters enjoy the nuts that become ready this time of year.  Black walnuts are hailing down everywhere.  Acorns, too, are coming down by the handful.  Historically the Native Americans would gather the acorns and after soaking them to remove the bitter taste, would dry them so that the acorns could be ground into a flour.  I have been told it tastes a great deal like chickpea flour. 

As you walk along look for the seeds and pods.  Most everyone can identify acorns but do you recognize the conelike seed pods in this picture?  These are from the Tulip Poplar.  When the seedpod dropped from the tree, it looked a great deal like a pine cone.  However after letting it sit and dry, it gradually opened to reveal itself.  


Winter will be here soon.  When you get the opportunity, enjoy what this season offers you.

Monday, September 3, 2012

Natural verses Organic Farming

There is a lot of confusion in the market place regarding the differences in 'Natural' verses 'Organic' farm goods.  Although sometimes the words are used interchangeably, they can be quite different things.  In the US, products marketed as 'Organic' must meet certain guildlines and come from Organic Certified sources.  'Natural' products are not always from certified sources.  So what's the difference? 


In 1990, the Organic Food Production Act was passed by Congress to "establish uniform national standards for the production and handling of foods labeled as “organic.” The Act authorized a new USDA National Organic Program (NOP) to set national standards for the production, handling, and processing of organically grown agricultural products. In addition, the Program oversees mandatory certification of organic production. The Act also established the National Organic Standards Board (NOSB) which advises the Secretary of Agriculture in setting the standards upon which the NOP is based. Producers who meet standards set by the NOP may label their products as “USDA Certified Organic.”

Later in 1995, specific definitions were further outlined to help clarify to the consumer what the 'Organic' label means.  Also at this time, the beginnings of regulations and enforcement came down, providing specific structure for farms and dairies to be certified organic.  These guidelines were finalized in 2000 and the law enacted in 2001.  It can take as much as three years to get certified.  Once completed, the farm or area within the farm is periodically recertified.  If for whatever reason the certification is lost, the farm cannot be re-certified until it once again reaches the required standards and passes thorough inspection.  For example: in Washington state, the use of an unapproved substance may result in a loss of organic certification for 36 months.

Here at My Happy Acres, although we are not currently certified Organic, we believe in and practice sustainable agricultural methods.  We have clean ground water and like many small farmers, do everything we can to maintain its integrity.  Living close to the land is not a fad or catch phase, but is our way of life.

If you are interested in Organic production and are willing to dive into 'the deep end of the pool', Cornell University has some guides that you may be interested in.  These are free to download and have lots of good information outlining the general practices recommended by them.

Saturday, August 25, 2012

Spicing up your life

Did you know that there are over 1000 varieties of pepper?  A typical grocery store may carry a few such as the sweet bell pepper or Jalapeno chili but that doesn't begin to scratch the surface of the flavors and varieties out there. 
Most people don't realize that many of the peppers we enjoy today originated from South America.  We take for granted those wonderful little surprises that make many of the southeast Asia dishes so tasty.  As peppers come into season, you can enjoy them fresh, pickled, dried, roasted, or even frozen for later use.
Some people say that they don't like peppers because they are too spicy.  With over a thousand to choose from, the favors are as varied as the peppers themselves.  The Poblano pepper for example adds a rich spiciness to your dish.  Just a word of warning: the heat can vary from pepper to pepper on the same plant.  Additionally when allowed to red ripen and then dried, the Poblano becomes the chile ancho a popular addition to many Mexican and Central American dishes.

Another popular chili is the Banana pepper.  These are available in both a sweet and hot variety.  We enjoy these pickled as a bright side dish or garnish to our summer picnic table.   One of our favorites is the Cherry Bomb pepper.  These can be amazingly hot.  About  the size of a golf ball, these can be stuffed with cheese or prosciutto to make Poppers that your guests will always remember!

So seek out new varieties of the season's peppers and enjoy the spicy side of life!

For further reading and other fun:
http://www.chilipeppermadness.com/

Thursday, August 2, 2012

Harvesting and stocking up for the winter

Two weeks ago I did a posting about green beans and provided a lovely recipe for DH's favorite three bean salad.  I assumed that everyone knew what 'blanched' meant however learned that some of you needed a few hints on how to do this so that the vegetables come out crisp tender.

To begin, the smaller the amount of time between harvest and freezing or canning your vegetables the higher amount of nutrition you will receive from them.  This also goes for flavor.  Vegetables just taste best when fresh from the field or garden.  For the best flavor, pick your vegetables in the cool of the morning.

Although others may work a little quicker than I, it takes me about an hour to prepare and process a gallon of green beans.  You will need to following to blanch and prepare your vegetables for freezing.
  1. large bowl to hold fresh picked vegetables (or keep them in your clean garden bucket)
  2. large bowl to hold cleaned raw vegetables
  3. large pot for boiling water and stainless steel stainer to hold vegetables while cooking.
  4. large bowl of iced water with a colander for holding and draining
  5. vacuum sealer or press and seal freezer bags.
Although this process can be used for nearly any vegetable, we're using green beans (mostly because that's what is coming from the garden in the greatest abundance).

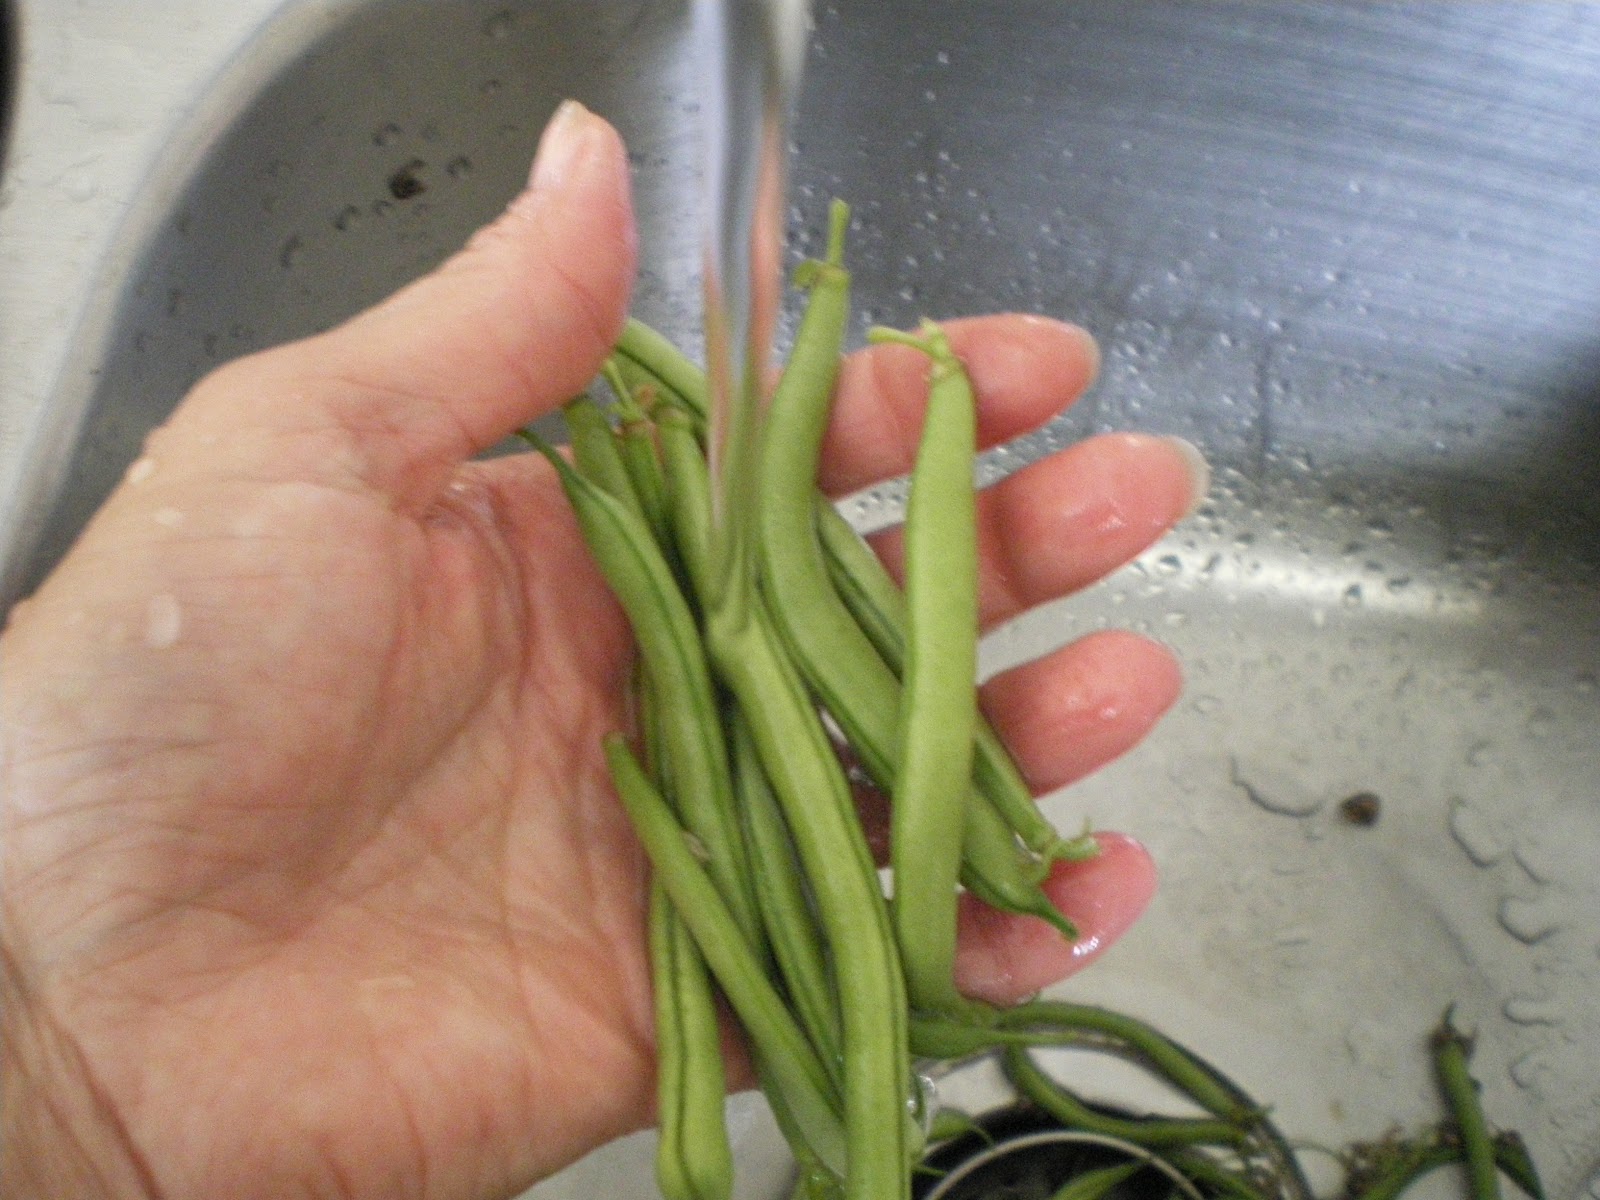
Before beginning, clear your counter space to allow you to work efficiently.  The configuration of my kitchen allows me to work in clockwise.  Starting at the sink, take a small handful of beans and gently rinse the dirt and plant debris, such as the dried blossoms, from the beans.  Pinch or cut off the stem attachment and discard.  Now snap or cut the clean beans into 1 - 2 inch segments.  If the green or yellow beans are fresh, they should easily snap into pieces.  If they are a little rubbery, it just means that the beans may not the freshest however may still have good flavor.

Rinse the dirt from your beans

Once the stem attachment has been removed, snap your beans into 1 - 2 inch segments.
While you're cleaning your beans, set a large pot of unsalted water on the stove to boil.  As soon as it reaches a rolling boil, take a handful of beans and drop them into the straining basket so that the beans are covered in water but not bouncing around in the water bath.  Many of the better cookbooks also contain a reference table for how long to keep them in the water bath in order to blanch them until crisp tender.  I typically cook mine until they turn a truly lovely shade of bright green which is about 3 minutes. 

When starting out, you may want to take one out of the bath (careful: HOT), rinse it in the cold iced water, then taste if it is cooked to your liking.  whatever you do: don't cook it until it turns to mush or turns grey green.  if you are freezing your harvest, you will most likely be thawing and cooking it at a later date.  You want it to be a wee bit raw to hold those lovely flavors!  Remember that those bright colors are the nutrition you're saving.  Don't boil away the vitamins!

Boil about three minutes, until crisp tender
When ready, drain the hot vegetables and plunge them into an ice water bath to cool and halt the cooking process.  This will preserve the color and lock in those vitamins!  Once cool, the drained beans are ready to ladle into the freezer bags.
Plunge into an ice water bath to stop the cooking and retain the nice color
Drain the beans throroughly before spooning them into freezer bags.  Be sure to remove as much air as possible before sealing.  This can be done in several ways:  if using a vacuum sealer, follow the directions for your appliance, add your vegetables, evacuate and seal each package.  If using press and seal plastic bags, scoop the vegetables into the bag, then place the bag open side up into a pan of cold water to press the air out.  Be careful not to submerge the open bag into the water and get water in the bag!  When the air has been removed to your satisfaction, seal the bag and remove it from the water.

Add the cool, drained beans to the freezer bag, seal, and freeze
Why remove the air? Air pockets will allow frost to form, causing freezer burn and will eventually undo your efforts.  Vegetables prepared in this way can last a long time and will continue to feed your family well into Winter when Summer is just a delight as we peruse our seed catalogs dreaming of next year's garden.


Tuesday, June 19, 2012

Gardening 101: Support, part one

When looking at these little seeds or watching spindlely sprouts struggle and grow, it's hard to imagine that in just a few more weeks vines and indeterminate vegetables are going to need some kind of support.

Ever wonder how some people get those lovely, straight cucumbers?  Uniformally shaped, perfect in color, and no soft spots these are say first place at the county fair!  What about tomatoes?  how can you maximize yield yet still be able to support a load of healthy fruit?

Let's start with the seeds.  when you're looking at the seed packets or at the plant tags look for these words "indeterminate" or "determinate".  Basically what this means is how compact the plant will be when mature.  Those with limited space or who are doing container gardening may be more satisfied with determinate varieties.  Those with more space and room to grow may want to try their hand at indeterminate varieties.

At My Happy Acres we grow indeterminate varieties.  This allows us to train the plants to their support.  We have used a variety of materials however have found that vining plants such as cucumbers, summer squash, ole beans, and some gourds grow best when trained to Cattle feedlot panels.  These fencing units are sturdy, affordable, and last many, many seasons.  We have the 16-footers however these panels come in a variety of dimensions.  Six foot steel fence posts are evenly spaced and driven in the ground along the area where the planting will take place.  The panel is then attached with wire to the post.

Plant the cucumber about four inches from the base of the  panel.  Be aware: your neighbors and loved ones may laugh and point when they see this giant structure beside these wee little plants.  But wait.  In a few short weeks with a little water and a little care, these tiny seedlings will suddenly be springing up.  As they grow, gently lift and weave the vine and leaves to the panel.  When the time comes and the cucumbers (or summer squash or pole beans) start to form, they will be up off the ground so less likely to be misshapen, subjected to slug or snail damage, or the nibblings of passing  bunnies looking for vegie snacks.


This technique can also be used for other plants such as tomatoes however we have found another method for tomatoes that we will detail in a future post.  Have fun and keep an open mind to try new things.


Friday, June 1, 2012

Today's readings

this morning has had all sorts of interesting stuff to read.

About the Bees:  http://www.hobbyfarms.com/crops-and-gardening/harvest-honey-new-way.aspx
I had wondered about this.  some of the old guys at the orchards said that one should harvest honey in Spring.  in that way the bees have enough to carry them for the winter and the hive will be healthier in the long run.  when I look at how much of the commercial honey is harvested it gives me pause.  Honey has all sorts of good stuff in it including enzymes that boost immunity and aide in wound healing.  to say that giving bees diluted corn syrup as a substitute for harvested honey seems contrary to common sense.  but what do I know?  I have no experience in this.  but I keep reading...

Bees in wild Blackberries
Eggs
On the other hand, something I do have a wee bit of experience with is eggs.  there are so many pluses about eating eggs.  it was nice to see someone write up all these benefits: http://pakagri.blogspot.com/2012/06/10-health-benefits-of-eggs.html


Missy
the day is pretty overcast.  I have my fingers crossed for soft steady rains.