Two weeks ago I did a posting about green beans and provided a lovely recipe for DH's favorite three bean salad. I assumed that everyone knew what 'blanched' meant however learned that some of you needed a few hints on how to do this so that the vegetables come out crisp tender.
To begin, the smaller the amount of time between harvest and freezing or canning your vegetables the higher amount of nutrition you will receive from them. This also goes for flavor. Vegetables just taste best when fresh from the field or garden. For the best flavor, pick your vegetables in the cool of the morning.
Although others may work a little quicker than I, it takes me about an hour to prepare and process a gallon of green beans. You will need to following to blanch and prepare your vegetables for freezing.
large bowl to hold fresh picked vegetables (or keep them in your clean garden bucket)
large bowl to hold cleaned raw vegetables
large pot for boiling water and stainless steel stainer to hold vegetables while cooking.
large bowl of iced water with a colander for holding and draining
vacuum sealer or press and seal freezer bags.
Although this process can be used for nearly any vegetable, we're using green beans (mostly because that's what is coming from the garden in the greatest abundance).
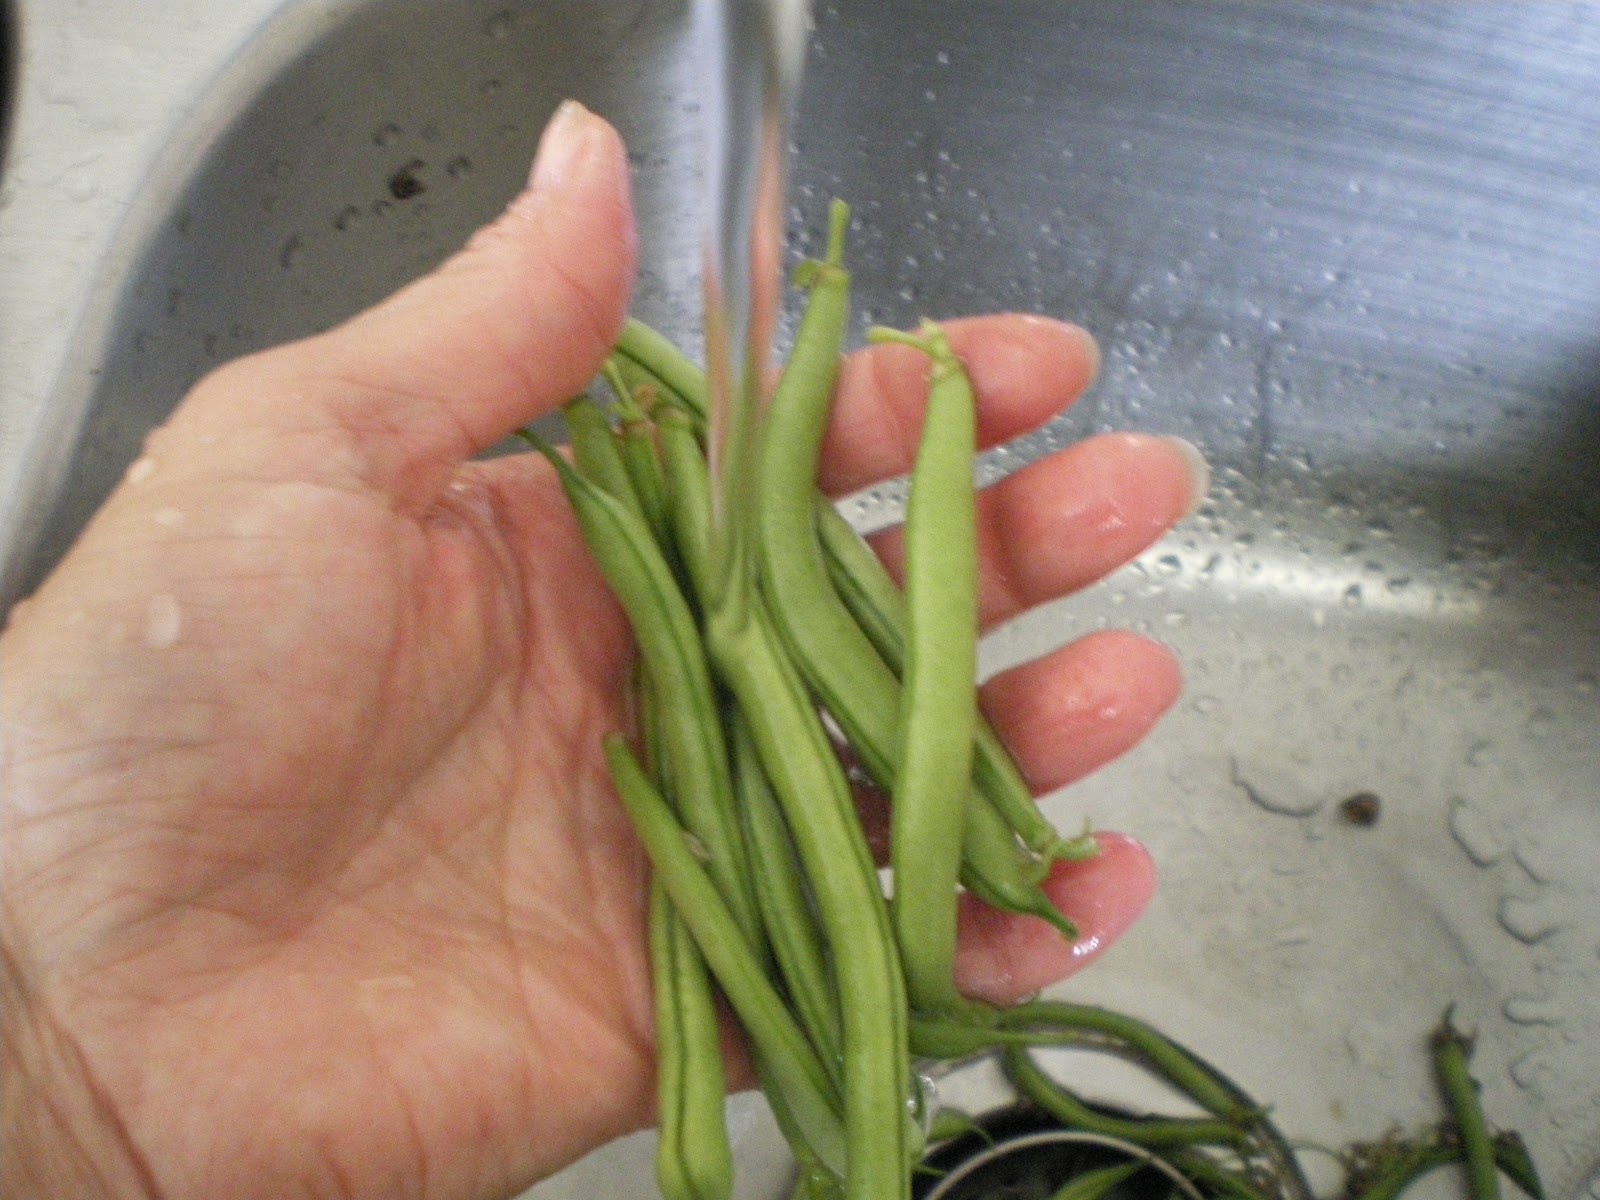
Before beginning, clear your counter space to allow you to work efficiently. The configuration of my kitchen allows me to work in clockwise. Starting at the sink, take a small handful of beans and gently rinse the dirt and plant debris, such as the dried blossoms, from the beans. Pinch or cut off the stem attachment and discard. Now snap or cut the clean beans into 1 - 2 inch segments. If the green or yellow beans are fresh, they should easily snap into pieces. If they are a little rubbery, it just means that the beans may not the freshest however may still have good flavor.
 |
| Rinse the dirt from your beans |
 |
| Once the stem attachment has been removed, snap your beans into 1 - 2 inch segments. |
While you're cleaning your beans, set a large pot of unsalted water on the stove to boil. As soon as it reaches a rolling boil, take a handful of beans and drop them into the straining basket so that the beans are covered in water but not bouncing around in the water bath. Many of the better cookbooks also contain a reference table for how long to keep them in the water bath in order to blanch them until crisp tender. I typically cook mine until they turn a truly lovely shade of bright green which is about 3 minutes.
When starting out, you may want to take one out of the bath (careful: HOT), rinse it in the cold iced water, then taste if it is cooked to your liking. whatever you do: don't cook it until it turns to mush or turns grey green. if you are freezing your harvest, you will most likely be thawing and cooking it at a later date. You want it to be a wee bit raw to hold those lovely flavors! Remember that those bright colors are the nutrition you're saving. Don't boil away the vitamins!
 |
| Boil about three minutes, until crisp tender |
When ready, drain the hot vegetables and plunge them into an ice water bath to cool and halt the cooking process. This will preserve the color and lock in those vitamins! Once cool, the drained beans are ready to ladle into the freezer bags.
 |
| Plunge into an ice water bath to stop the cooking and retain the nice color |
Drain the beans throroughly before spooning them into freezer bags. Be sure to remove as much air as possible before sealing. This can be done in several ways: if using a vacuum sealer, follow the directions for your appliance, add your vegetables, evacuate and seal each package. If using press and seal plastic bags, scoop the vegetables into the bag, then place the bag open side up into a pan of cold water to press the air out. Be careful not to submerge the open bag into the water and get water in the bag! When the air has been removed to your satisfaction, seal the bag and remove it from the water.
 |
| Add the cool, drained beans to the freezer bag, seal, and freeze |
Why remove the air? Air pockets will allow frost to form, causing freezer burn and will eventually undo your efforts. Vegetables prepared in this way can last a long time and will continue to feed your family well into Winter when Summer is just a delight as we peruse our seed catalogs dreaming of next year's garden.
 Most people don't realize that many of the peppers we enjoy today originated from South America. We take for granted those wonderful little surprises that make many of the southeast Asia dishes so tasty. As peppers come into season, you can enjoy them fresh, pickled, dried, roasted, or even frozen for later use.
 Some people say that they don't like peppers because they are too spicy. With over a thousand to choose from, the favors are as varied as the peppers themselves. The Poblano pepper for example adds a rich spiciness to your dish. Just a word of warning: the heat can vary from pepper to pepper on the same plant. Additionally when allowed to red ripen and then dried, the Poblano becomes the chile ancho a popular addition to many Mexican and Central American dishes.
 Another popular chili is the Banana pepper. These are available in both a sweet and hot variety. We enjoy these pickled as a bright side dish or garnish to our summer picnic table. One of our favorites is the Cherry Bomb pepper. These can be amazingly hot. About the size of a golf ball, these can be stuffed with cheese or prosciutto to make Poppers that your guests will always remember!
 So seek out new varieties of the season's peppers and enjoy the spicy side of life!